
Stepping from Indefinite Leave to Remain (ILR) into full British citizenship is more than paperwork—it’s the moment you truly call the UK home. Whether you’ve lived here five years on a work visa, rejoined family after settlement, or followed a different route, applying for citizenship cements your place in British life. This guide combines practical clarity with real-world stories so you know exactly what’s ahead: the tests, the fees, the calendar, and the small traps that can trip you up.
Why Becoming a British Citizen Matters
You’ve already done the heavy lifting for ILR: sorting visas, logging absences and proving your ties. Citizenship is the last step on that journey—and it unlocks:
- Unrestricted travel
A British passport currently grants visa-free or visa-on-arrival access to over 180 countries. No more worrying about embassy appointments in Paris before a weekend getaway. - Political rights
Vote in every UK election and stand for local or national office. Your voice becomes part of British democracy. - Security and permanence
Unlike ILR—where long absences or certain criminal offences can lead to revocation—citizenship can only be stripped in extreme fraud cases. - Simplicity for loved ones
As a citizen, sponsoring family becomes more straightforward; children born here automatically qualify, avoiding future visa renewals.
Sara’s Story
Sara arrived in 2012 on a Tier 2 visa. In 2018 she secured ILR and spent three more years weighing up citizenship. “I loved my bronze biometric residence permit, but I hated renewing it every ten years. When I finally did the Life in the UK Test, passed first time, and stood up at my ceremony, I felt…complete.”
Who Can Apply: The Core Eligibility Checklist
Before you book your Life in the UK Test, tick off these five must-haves:
ILR granted (or equivalent) at least 12 months ago
- If you’re the spouse of a British citizen, you can apply immediately on receiving ILR.
- Holders of EU settled status follow the same ILR rules.
Five-year residence history
- You must have lived in the UK for 5 years before your application date.
- Absence limits: No more than 450 days abroad in total, and no more than 90 days in the 12 months immediately before applying.
Good character
- Serious or recent convictions can derail your application.
- Undeclared hospital fines, tax debts or even some driving offences may count; honesty is non-negotiable.
Language proficiency
- Demonstrate English, Welsh or Scottish Gaelic at CEFR B1 level or above.
- Accepted evidence: a secure English language test (e.g., IELTS), degree taught in English, or exemption (e.g., you’re over 65).
Life in the UK Test
- A 45-minute, 24-question computer-based exam on British history, governance and everyday life.
- You need at least 75% to pass.
Quick Tip
Book your Life in the UK Test as soon as your ILR turns 12 months old (or earlier if married to a British citizen). Test centres book up fast in big cities.
Breaking Down the Costs
Budgeting for citizenship goes beyond the headline fee. Here’s what a typical solo applicant should expect:
- Application fee (Form AN): £1,605
- Biometric enrolment: £19.20
- Life in the UK Test: £50 per attempt
- English test (if needed): £150–£200
- Document translation/certification: £20–£50 per document
- Ceremony extras (optional premium venues): up to £200
Total for a straightforward case: around £1,400–£1,500, depending on tests and translations.
Pro Insight
If you need an English test, some providers bundle test-plus-prep packages for £250–£300. Research local course reviews—you can save time and money.
Processing & Evidence Checks
If you need your citizenship decision faster, or simply want confidence that your application is error-free, consider:
- Document Checking Service (£19.20): Submit your scans before you apply; Home Office will flag missing, illegible or wrongly formatted documents so you can correct them before paying the full fee.
Pro tip: Combine both – book your evidence check as soon as your PDFs are ready, fix any issues within 48 hours, then pay for the priority route and enjoy true peace of mind.
Mapping Your Timeline
From “I’m ready” to “Welcome to citizenship,” plan for four to six months. Here’s a realistic breakdown:
Document collation (2–4 weeks)
Gather: passports, BRP card, test certificates, proof of residence (bank statements, utility bills), any name-change deeds.
Pro tip: Scan and name each PDF clearly (“Passport_FirstPage.pdf”), upload into a secure cloud folder.
Online application & payment (1 day)
Complete Form AN, upload your scans, pay £1,349.20, and book a biometric appointment.
Biometric appointment (within 1–2 weeks)
Visit your nearest UKVCAS centre for fingerprinting and photo. They’ll confirm your application is “in progress.”
Decision wait (3–4 months)
The Home Office aims to process 75% of straightforward cases within 3 months. Complex or borderline applications can stretch to 6 months.
Avoid chasing too early—you can only inquire after six months.
Ceremony invitation (2–4 weeks after approval)
Local councils typically invite you within a month of decision. You’ll attend a short ceremony—often over a cup of tea—take the Oath of Allegiance or Affirmation, and collect your certificate of naturalisation.
Passport application (immediately after ceremony)
Your naturalisation certificate is your key to a black British passport. Online applications are quick; postal submissions take longer but accommodate special photo requirements.
Post-Naturalisation Checklist
Once you’ve got your naturalisation certificate and passport application in hand, there are a few housekeeping tasks you won’t want to miss:
- Get on the Electoral Roll
Register at your local council so you can vote in every UK election. - Update Your Driver’s Licence
Swap your old residence permit endorsement for the “UK citizen” marker. - Notify HMRC & DWP
Let them know your status change—this can affect tax codes, benefits and National Insurance records. - Bank & Mortgage Update
Many financial institutions will ask for proof of citizenship rather than a BRP. - Travel with Confidence
Use your new British passport on your next trip—no more visa hassles and much smoother border crossings.
Case Example: James
James applied in January. His BRP showed a five-year work record, and he’d passed both tests. By April, he received approval. His ceremony booked for mid-May, and by June, he held his first British passport—five months total.
Avoiding Common Pitfalls
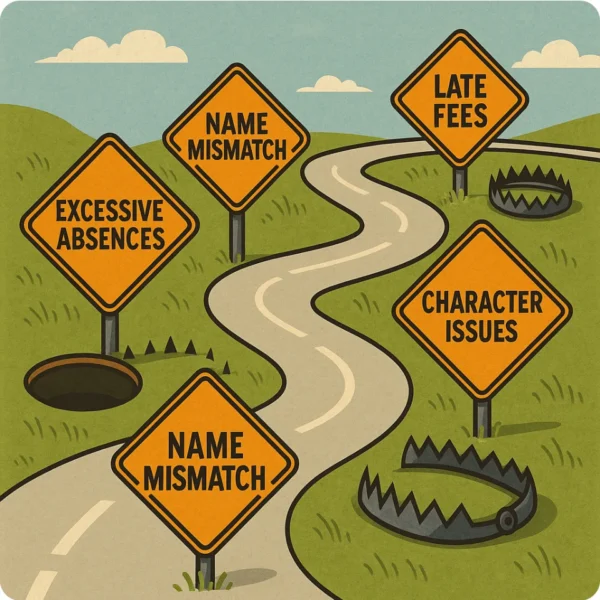
Excessive absences
Home Office checks more than just your passport stamps. Keep a simple log of dates if you travel frequently.
Name mismatches
Your application, passport and test certificates must display the same name. If you’ve changed your name (marriage, deed poll), upload certified evidence.
Incomplete character disclosures
Any cautions, binding over or traffic penalties must be declared. Hiding a minor conviction can result in refusal.
Late fee payments
Don’t miss booking your biometric slot within 30 days. Keep deadlines in a digital calendar with reminders.
Dual-Nationality & Renunciation Considerations
Becoming a British citizen doesn’t force you to give up your old passport—but each country has its own rules.
Check Your Birth Country’s Law
Some nations automatically strip citizenship if you acquire another, others allow it in parallel.
Tax & Residency Implications
Holding two passports can affect your tax residency status, especially if you spend time abroad. It’s worth a quick chat with your tax adviser.
Renunciation Process (if desired)
If you need—or want—to formally renounce your previous citizenship, you’ll usually deal with your home country’s embassy, pay a fee and submit evidence of your British status.
Refusals, Appeals & Administrative Review: What to Do if You’re Refused
If your application is refused, you’ll receive a formal decision letter detailing the grounds. Your options typically are:
- Administrative Review (within 14 calendar days): A Home Office official will re-check your case for obvious errors—no new evidence, but a quick route if something was mis-recorded.
- Reapplication: Fix the reason for refusal (e.g., top up absences, produce missing documents) and submit a fresh application—remember, new fees apply.
- Judicial Review: In rare, complex cases where the refusal breaches public law or Home Office policy, you may seek a court review. This is costly and time-consuming, so reserve it for serious errors.
Pro tip: As soon as you receive a refusal letter, contact an immigration specialist. Small errors—like a mis-typed date—often make you eligible for a free administrative review and a rapid reversal.
FAQs You’ll Really Want Answered
Q: Can I apply straight after getting ILR?
Spouses of British citizens: Yes, you may apply immediately upon ILR grant.
Other ILR holders: You must wait 12 months.
Q: My English test is expiring—what now?
Tests are valid for 2 years. If yours lapses before you apply, retake it. Book early to avoid delaying your citizenship application.
Q: What if my application is refused?
You’ll receive a refusal letter detailing why. Common reasons: excess absences, character doubts or missing documents. You can reapply once you resolve the issue, but fees aren’t refundable.
Q: Do children need to apply separately?
Children under 18 follow Form MN1 at a reduced fee (£1,012). They often have simpler interview waivers but attend a child-friendly ceremony.
Your Next Steps with Expert Support
British citizenship is a milestone—and it pays to get it right first time. We at Barar & Associates offer:
- Personalised eligibility reviews: We audit your absences, check character flags, and ensure test readiness.
- Document management: From examining translations to cross-checking names, we package your application for success.
- End-to-end handling: Online form completion, fee payments, biometric bookings, council liaison and ceremony prep.
Ready to cement your future in Britain? Book a citizenship strategy session today for clear, human-centred guidance every step of the way.